

DIY Barn Door Bliss
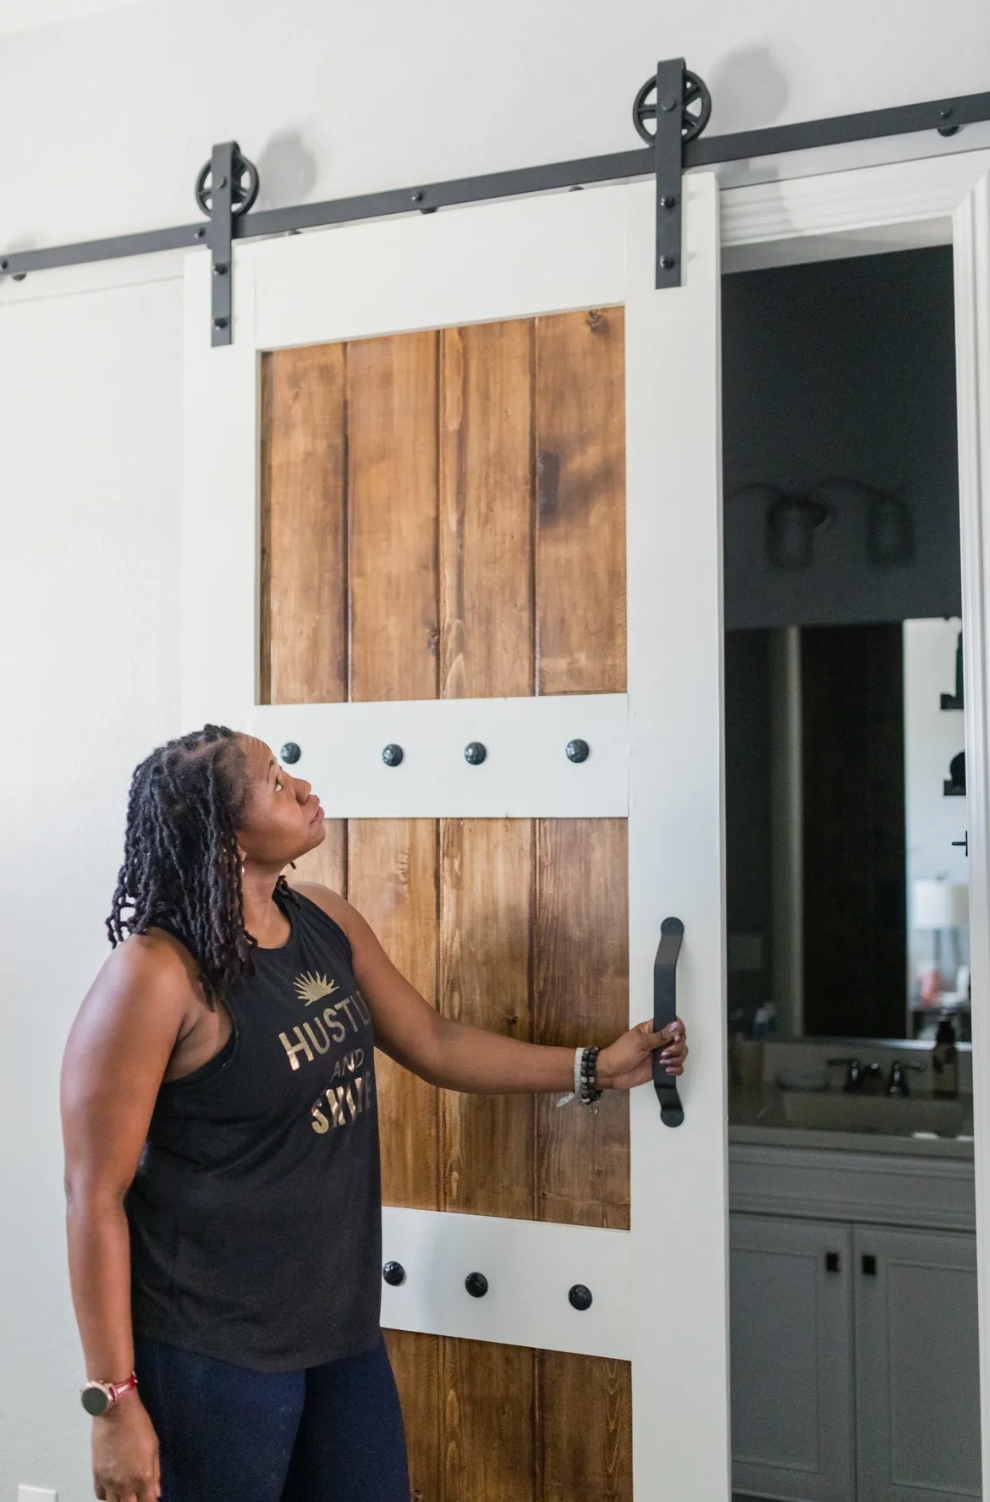
At first, I never understood the allure of a "barn door". However, I quickly found the name itself is a bit deceiving since not all barn doors are actually meant for the barn. Over the years, they have become more modernized and are perfect interior barn doors. They truly are just a really cool sliding door. And anyone who thinks these are going out of style probably doesn't have one and thus, doesn't realize the benefits. They are super functional and can even be a great piece of "art" to have in your home. Having barn doors in house are great for creating space or making a room look bigger.
I'm now on my third door and I've learned so much along the way. This blog post is not a DIY barn door post since there are so many tutorials available (just search Pinterest). What I do want to share are the tips and tricks I've learned along the way that have helped tremendously. Some are obvious, while others may not be something you would consider.
HEADER BOARDS

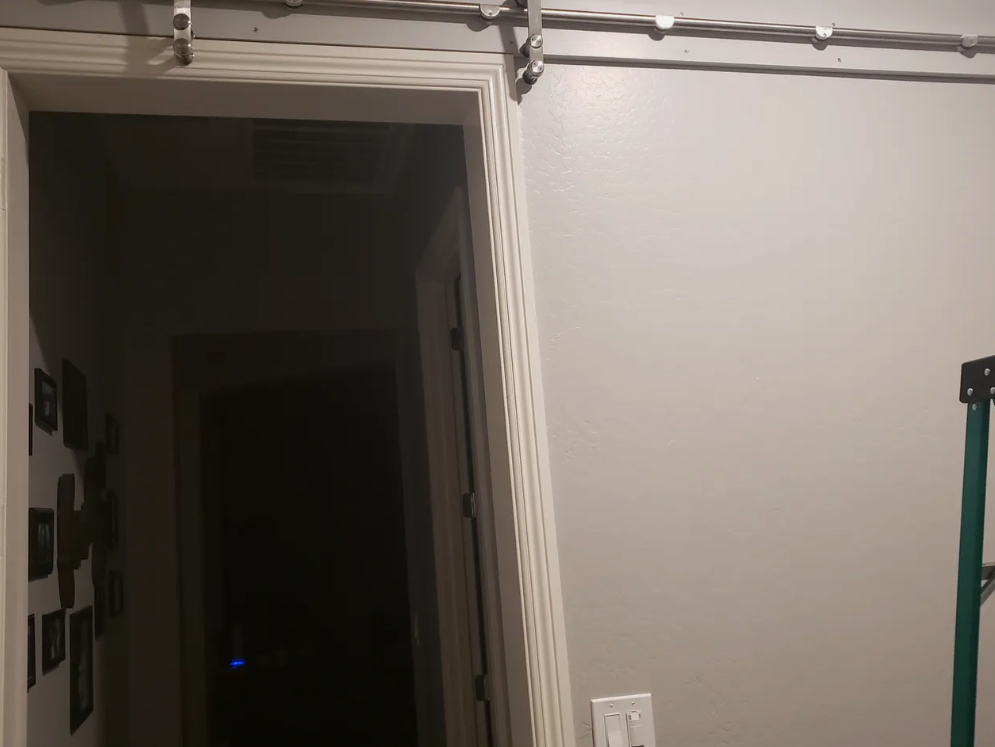
Depending on your setup you may or may not need a header board. For those that are unaware, a header board is a 1x4 or 1x6 piece of wood that is attached to the studs in the wall. It helps for those areas where you keep the door casing (as shown in the photo above). It gives your door some room to move against the wall without hitting the molding. If you don't have a casing or decided to remove it, you do not technically need the header board. However, I highly recommend it in either case because it makes it easier when attaching the track.
Each barn door track comes with pre-drilled holes that are usually 16" apart. Depending on where you install your door, more often than not, your track holes will not line up with your wall studs. And I don't know about you, but I trust wood screws instead of using drywall anchors. When installing the header board, use 2.5" or 3" wood screws. My go-to screws are Spax...they have a special star head that helps in making sure you don't strip the screw. And always (ALWAYS for the people in the back) pre-drill your holes and use an impact drill to ensure you have appropriate power.
For a more finished look, I like to countersink my screws. And of course, there's a tool for that. YAY!!! Well, not really a tool, but a bit that you can use to create countersink holes. Just make sure to use the correct size that corresponds with your screws. Before, I used to just push the screws in as far as I could, but realized it was not always far enough and couldn't fill the holes properly so the screws would still kind of show. So so glad I found a set of countersink bits that make my life easy. After you put the header board up, properly fill the holes with wood filler and you're all done!
As far as color goes, I like to match it to the wall color, but some people match it to the door casing. Either way is fine, just whatever you prefer.
HANG YOUR TRACK, THEN BUILD YOUR DOOR
Most people would think you can start with the door, but you might run into a lot of problems trying to measure to make it fit right. Or you'll end up with a door like my first door that is too high off the floor IMO. 😔 So once you figure out where you want your door, hang your header board and the track. Then you can use the instructions that came with the track to figure out the door height.
HAVE A PLAN
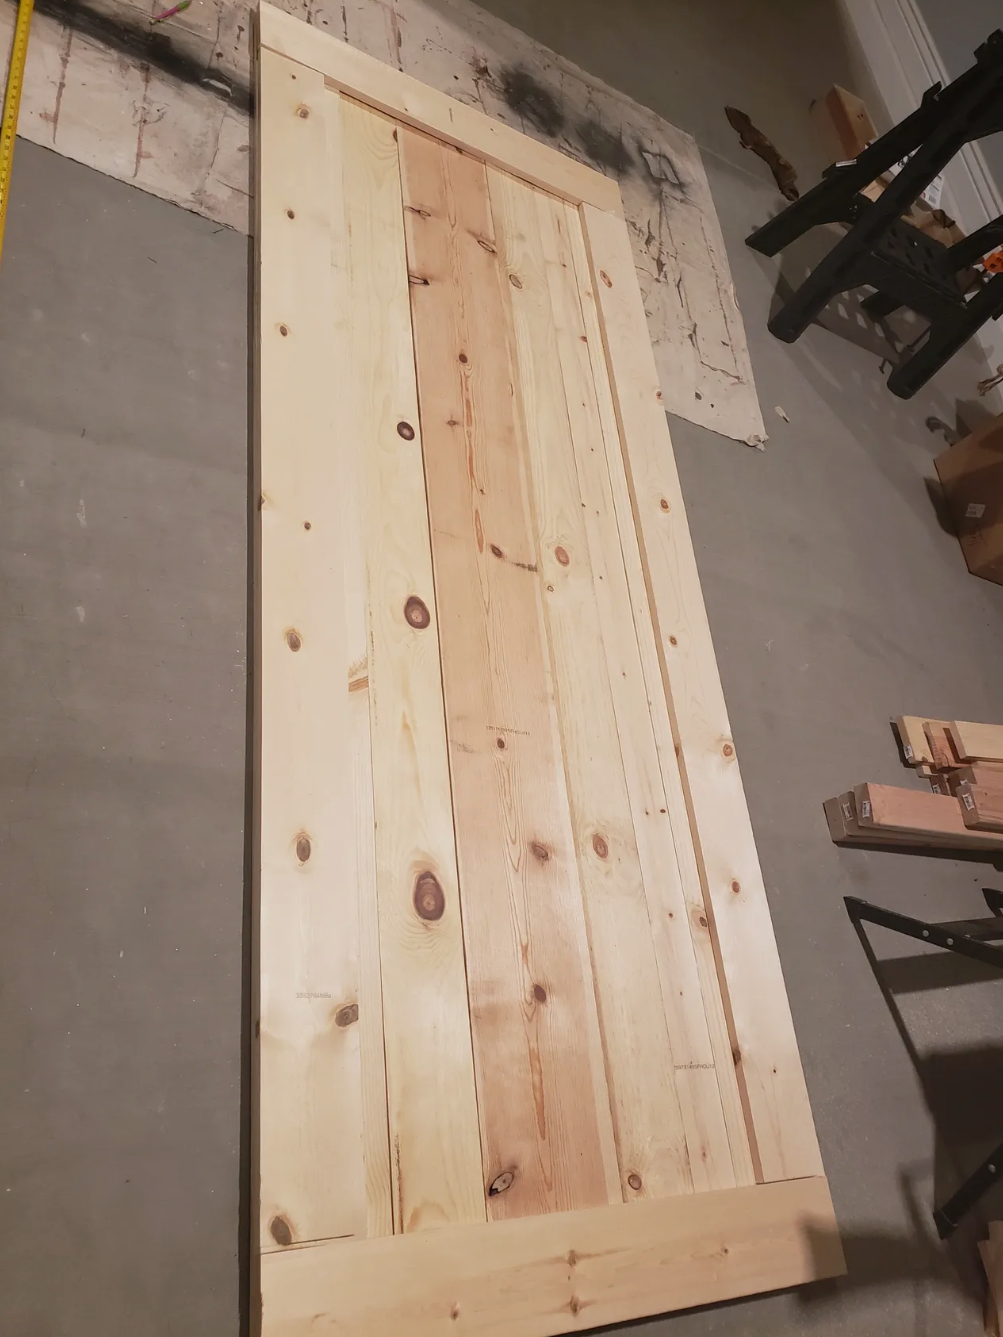
And by having a plan, I mean know what door design you want, including how much wood you need, as well as making sure you have the space to build. Start with a project planner that helps calculate what you need based on your measurements. There's nothing worse than having to stop midway through a project to head back to the store. Undoubtedly there is something you will forget, but you want to do the best you can to make those trips infrequent. If this is your first-ever DIY project, do some research so you know what you'll need (including nails, screws, paint, stain, wood filler, clamps, caulk, glue, finish, etc). If you don't have a lot of tools yet, no need to worry. Most stores and woodshops will cut your wood for you. Just make sure to know what measurements you need (where that project planner comes in handy). The more you know about what cuts you'll need, the smoother the process will be.
Make sure you have adequate space to build the door and area to move items around as you go. Having a couple saw horses is a necessity for all starter DIYers. They'll really help to get your project up off the floor and easier to manage as you go along. But there will be times you'll need to just work on the floor...just be prepared for that.
And be prepared for it to take longer than you would expect. Most doors can be built in a day (or maybe a weekend) if you have the time to devote. Definitely plan to have a couple tasks going on at the same time so that while you're waiting for maybe glue to dry or something, you can be working on something else. But it's all up to you how much time you want to devote to the project.
DON'T FORGET TO HAVE FUN

Building can be a very therapeutic process for some. You may get frustrated, but once you see the finished product, it'll be worth it. So, as you go along, just make sure you have fun and don't get overwhelmed. Take it piece by piece and make sure to step back and admire the finished product. And remember, no one else is going to see the mistakes that you see...they'll just see an amazing door!!!